
Somewhere between the over-styled hair of the 2010s and today’s obsession with over-complicated blowout tools, we collectively forgot one of beauty’s most reliable inventions: hot rollers.
While social media is saturated with tutorials featuring tools that cost more than a weekend away, the return of old-school rollers feels almost rebellious in its simplicity – or maybe that’s the lazy-girl in me, because honestly, who actually has any time?
What I appreciate most is how effortlessly they deliver that polished, lifted, long-lasting volume most of us assume requires a salon chair and a celebrity stylist named Chris Appleton to achieve.
I’m calling it The J-Lo Effect. You remember that Super Bowl hair from the 2020 halftime show – the blowout that genuinely looked like it defied gravity? I’ve been obsessed ever since.
Yes, she had a generous amount of hair extensions in there too, but that level of volume is unforgettable. Every celebrity seems to be chasing it now too, with a bouncy blow wave becoming the ultimate accessory.
And if you caught even a moment of backstage footage from the latest Victoria’s Secret show, it proves my point – but achieving that look is far less high-tech than most people think.
There’s no juggling six attachments, no complicated airflow settings, no need for the upper-body strength of a Pilates instructor. With the right prep, (affordable tools) and a little patience, you can absolutely achieve that VS-runway finish at home.
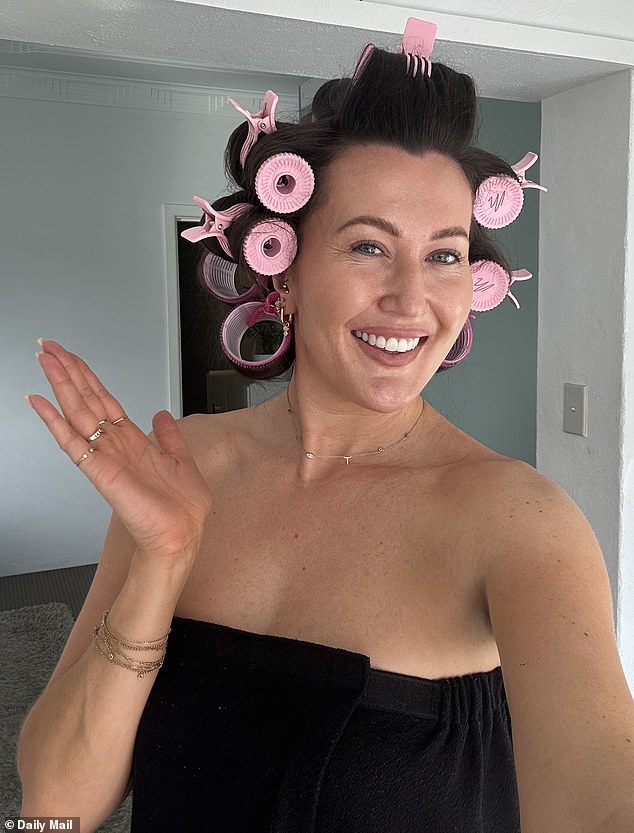
After revisiting hot rollers thanks to a newly gifted, sell-out set (more on them below), I’ve fully embraced my ‘grandma-core’ era, and this is the refined, step-by-step routine I use when I want a salon-quality finish without booking an appointment.

Somewhere between the over-styled hair of the 2010s and today’s obsession with over-complicated blowout tools, we collectively forgot one of beauty’s most reliable inventions: hot rollers. Pictured: Beauty expert Elise Wilson


Hot rollers deliver that polished, lifted, long-lasting volume we associate with J-Lo’s gravity-defying Super Bowl blowout (right) and the Victoria’s Secret runway (left, Emily Ratajkowski) – and the best part is, the look is far less high-tech than you’d think
In my toolkit
The Dyson Supersonic ($394) remains my most-used beauty tool thanks to its speed, lightness and heat control. I also own the Dyson Airwrap, though I’m conscious it’s a significant investment and not everyone has the luxury of owning one!
My newest favourite addition, however, (and what inspired this week’s column) is the Mermade Hair Digital Hot Rollers (now $119). They sold out instantly when they launched, and after testing them, I understand why.
They have two heat setting and have clips included for easy storage. These effectively set ‘memory’ into the hair, resulting in movement and volume that lasts without the need for harsh heat.
It’s no wonder our grandmothers relied on them so religiously. They worked then, and they work now, just with better materials, better heating systems and a far sleeker design. Plus these are pink… what’s not to love?
As for hairbrushes, I’ve had mine for years, so investing in quality does go a long way. A vented barrel brush for blowdrying, a wide tooth-comb brush for separating waves and a decent boar-bristle brush work wonders for this look.
And because my hair needs more than eight rollers, I popped a few velcro ones in the back of my hair – the ones pictured cost me approximately $5 for the Reject Shop from memory.

In my toolkit: The Dyson Supersonic ($394), Mermade Hair Digital Hot Rollers ($119), and great selection of brushes (that I’ve owned for years)
STEP ONE: Start in the Shower
It sounds minor, but the products you use in the shower determine whether your hair holds shape later. Anything too heavy or overly moisturising will make curls collapse before they even begin.
I always start with a scalp reset. For oilier roots or post-product build-up days, the Christophe Robin Cleansing Purifying Scrub with Sea Salt ($54) remains unmatched. If you prefer a chemical option, an AHA Exfoliant Rinse like Growth Bomb’s ($19.99) works beautifully to lift impurities and clear the scalp.
From there, I move to a volumising shampoo and conditioner – I can’t stress this enough. Fraim Haircare’s new Volumising range ($16 each), which I recently discovered at the Priceline Beauty event, genuinely plumps the cuticle, smells amazing and is really lightweight.

Fraim Haircare’s new Volumising range ($16 each), which I recently discovered at the Priceline Beauty event, genuinely plumps the cuticle, smells amazing and is really lightweight
STEP TWO: Prep properly, it matters
Mousse is widely misunderstood, but every long-lasting salon blowout I’ve had has started with a good one. It provides grip and structure without the need for excessive heat.
I use the Goldwell Stylesign Bodifying Brilliance Mousse ($25), which is light, non-sticky and ideal for fine to medium hair. It adds lift at the roots without that dated, crunchy feel.
Next comes a mist of heat protectant – I love Bondi Boost HG Heat Protect Spray ($25.20) for being feather-light and genuinely effective – followed by a very small amount of Maria Nila True Soft Argan Oil ($30) through the ends to prevent frizz and maintain a smooth finish. This one is great for fine hair too.
As for hairspray, I keep KMS Hair Stay Working Spray ($39.95) on hand, which is beautiful, but a classic can of L’Oreal Elnett works just as well. Just avoid anything too heavy or lacquer-like – it will only weigh down fine hair.


Mousse is widely misunderstood, but every long-lasting salon blowout I’ve had has started with a good one. It provides grip and structure without the need for excessive heat. Pictured: Goldwell Stylesign Bodifying Brilliance Mousse ($25)
STEP THREE: Elevate shine
Firstly, I rough-dry my hair upside down until about 70 per cent dry. This step alone changes the outcome with more volume, faster styling and significantly better hold.
Over-directing is key here, so I blow-dry the hair in the opposite direction it naturally falls with a large paddle brush. It feels counterintuitive, but the lift it creates at the roots is unmatched.
However, the true shine is a result of sealing the cuticle, not coating it with product or drying it fully upside down.
Using a barrel brush, I go on to smooth each section downward while directing heat along the shaft. This creates a polished, reflective finish and minimises as much fuzz as possible in the prep stages.

True shine is a result of sealing the cuticle, not coating it with product. After blowdrying my locks upside down until it’s 70 per cent dry, I then use a barrel brush, and smooth each section downward while directing heat along the shaft to minimse frizz and smooth
As soon as a section is dry and smooth, I wrap it carefully into a hot roller. This allows the curl to set as it cools, which is the real secret to longevity.
I won’t lie, these rollers get pretty warm, so take your time and hold them at the ends so you don’t burn your fingers – or scalp.
While they all work their magic, I get on with the rest of my routine – makeup, emails, coffee, cleaning, all of it.

As soon as a section is dry and smooth, I wrap it carefully into a hot roller. This allows the curl to set as it cools, which is the real secret to longevity. These rollers get pretty warm, so take your time and hold them at the ends so you don’t burn your fingers – or scalp
STEP FOUR: Create a bouncy, brushed-out finish
After the rollers have cooled completely (around 30 to 40 minutes), I remove them and lightly set my hair with a light hairspray. Use one with a ‘flexible’ hold that helps keep movement in the hair while maintaining structure.
I then use a wide-tooth comb to break up the curls and blend them, followed by a boar-bristle brush to help sculpt the top section, giving that refined, Old Hollywood silhouette. However, try not to over-brush.


Once the rollers have fully cooled (about 30–40 minutes), I take them out and set the style with a flexible-hold hairspray. A wide-tooth comb breaks up the curls, while a boar-bristle brush shapes the top for that refined Old Hollywood finish – just be careful not to over-brush
My industry trick is texture powder
A small amount of texture powder at the roots creates discreet lift and grip, almost like subtle backcombing without the damage.
I use KYK Hair Magic Dust ($28.95), but honestly any one from the pharmacy’s hair section will do. But be sure to use this sparingly (it’s powerful) and focus only on the roots instead of the lengths- otherwise it might be giving more birds-nest than hot babe.
I then tend to flip my parting over so it goes against my cowlick as it always holds the volume better and stops the dreaded ‘drooping’ at the front.
Finish with a gentle veil of hairspray from above to smooth flyaways and lock-in the style without flattening your hard-earned volume.


My industry trick is texture powder – a small amount at the roots creates discreet lift and grip, almost like subtle backcombing without the damage. Pictured: KYK Hair Magic Dust ($28.95)

I then tend to flip my parting over so it goes against my cowlick as it always holds the volume better and stops the dreaded ‘drooping’ at the front. Pictured with my finished do’
Achieving a glossy, voluminous blowout isn’t about owning the most expensive tools, but more about your technique and smart product selection.
And if there’s one thing the beauty industry has taught us, it’s that the classics always resurface for a reason – and what better time to treat yourself to a little pre-Christmas gift.
Disclaimer:
The views and opinions expressed in this article are solely my own and do not reflect those of any brands or companies mentioned. This content is not sponsored or endorsed.